All About Azure Virtual Machine

Introduction to Azure
Microsoft Azure is a comprehensive cloud computing platform that supports a wide range of services and solutions. Organizations and developers use Azure for various purposes across infrastructure, development, and data science domains. Below are the major use cases explained:
1. Web Hosting
Azure provides robust support for hosting websites, web applications, blogs, and REST APIs. Through services like Azure App Service and Azure Static Web Apps, users can deploy scalable and secure web applications with minimal infrastructure management.
2. Virtual Machines (VMs)
Azure enables users to create and manage Virtual Machines on demand. These VMs can run various operating systems like Windows or Linux, and are ideal for hosting applications, running custom software, or simulating an on-premise environment in the cloud. This falls under Infrastructure as a Service (IaaS).
3. Databases
Azure offers multiple managed database services such as Azure SQL Database, Azure Database for MySQL, and Azure Cosmos DB. These services allow users to create scalable and highly available databases without the overhead of managing the underlying infrastructure.
4. Storage
Azure provides cloud-based storage solutions like Azure Blob Storage, Azure Files, and Azure Disk Storage. These can be used to store and manage large amounts of unstructured or structured data, such as files, backups, logs, images, and videos.
5. Networking
Azure networking services include tools like Virtual Networks (VNet), VPN Gateway, and Azure Front Door. These allow secure communication between services, hybrid connectivity between on-premises and cloud systems, and delivery optimization for global applications.
6. Security & Identity Services
These tools protect your apps, data, and users in the cloud by managing access, storing secrets, and detecting threats.
Azure Active Directory (Azure AD) - Identity and access management
Azure Key Vault - Secure storage for secrets and keys
Role-Based Access Control (RBAC) - Assign permissions to users and apps
Microsoft Defender for Cloud - Threat detection and security recommendations
Azure Firewall - Controls network traffic
Azure DDoS Protection - Prevents service overload attacks
Azure Pricing
Pay-as-you-go: Pay only for what you use
Reserved Instances: Prepay for 1 or 3 years to save money
Spot Pricing: Big discounts for temporary, interruptible workloads
Free Tier: Some services are free or have free limits
Azure Pricing Calculator: to estimate the cost before creating resources
Key Azure Concepts to Know
Resource Group: A container for related resources like VMs, storage, etc.
Azure Portal: Web interface to manage Azure services.
Azure CLI / PowerShell: Command-line tools for scripting and automation.
Subscription: Your billing unit—everything you use is tied to it.
Regions: Geographic locations where Azure data centers are (e.g., East US, West Europe).
🖥️ What is a Virtual Machine (VM)?
A Virtual Machine (VM) is like a computer inside a computer.
A Virtual Machine (VM) is a software-based computer that runs inside another physical computer.It behaves just like a real computer — it has its own operating system (OS), CPU, memory (RAM), storage, and network access — but it's not a physical machine. Instead, it runs virtually using software.
Definition:-
A Virtual Machine (VM) is a virtualized environment that runs an independent operating system and applications on top of a hypervisor, which manages physical hardware resources.
Basic Features of Azure Virtual Machines
Custom Operating Systems
- Run Windows or Linux based on your needs.
Scalability
Choose how much CPU, RAM, and disk you need.
Easily resize your VM anytime.
Remote Access
Connect from anywhere using:
RDP for Windows
SSH for Linux
Pay-as-You-Go Pricing
- Pay only while your VM is running — no upfront cost.
Persistent Storage
- Data is not lost when you stop or restart the VM.
Security
- Use Network Security Groups (NSG), firewalls, and encryption to protect your VM.
Global Availability
- Create VMs in any Azure region around the world.
Basic Use Cases of Azure VMs
Host a Website or App
Run personal or business websites and backend services.Develop and Test Software
Build, test, or debug applications in a safe environment.Learn and Practice OS or Tools
Try out Linux, Windows Server, or any software without affecting your own PC.Use as Remote Desktop
Access a virtual computer from anywhere.Run Temporary Tasks
Use VMs for short-term jobs like scripts, training, or demos.
Conclusion:
Azure VMs provide flexible, scalable, and secure cloud-based computers that let you run applications, host websites, develop software, and manage workloads without owning physical hardware. They offer easy setup, global availability, and pay-as-you-go pricing, making them ideal for businesses and developers of all sizes.
How to Use a Virtual Machine in Microsoft Azure (Step-by-Step)
Step 1: Log in to the Azure Portal
- Sign in with your Microsoft/Azure account.
Step 2: Create a Virtual Machine
In the search bar at the top, type "Virtual Machines" and click it.
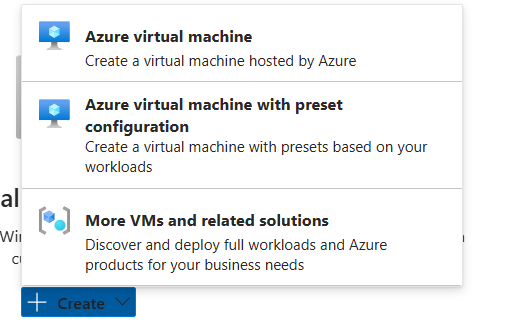
Click + Create > Azure virtual machine
Fill in basic details:
Subscription: Select your subscription
Resource group: Create new (e.g.,
shreiya)Virtual machine name: Example
MyFirstVMRegion: Choose nearest location (e.g., Central India, East US)
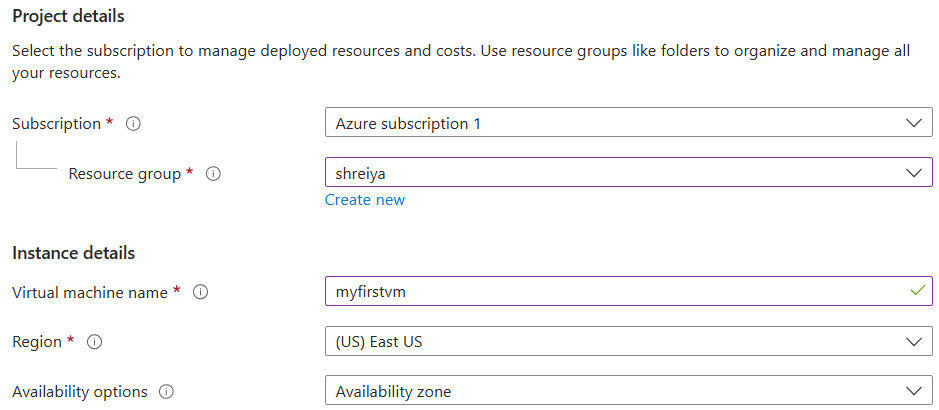
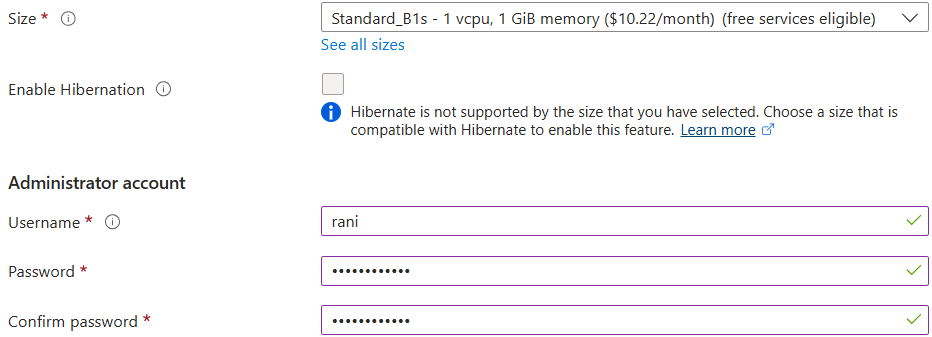
Image: Choose OS (e.g., Windows Server 2022, Ubuntu)

Size: Choose based on need or keep it at the Default setting
Administrator username/password: Create a login for the VM
Click Next through the other tabs or leave the default settings
Step 4: Review and Create
Click Review + create
Then click Create
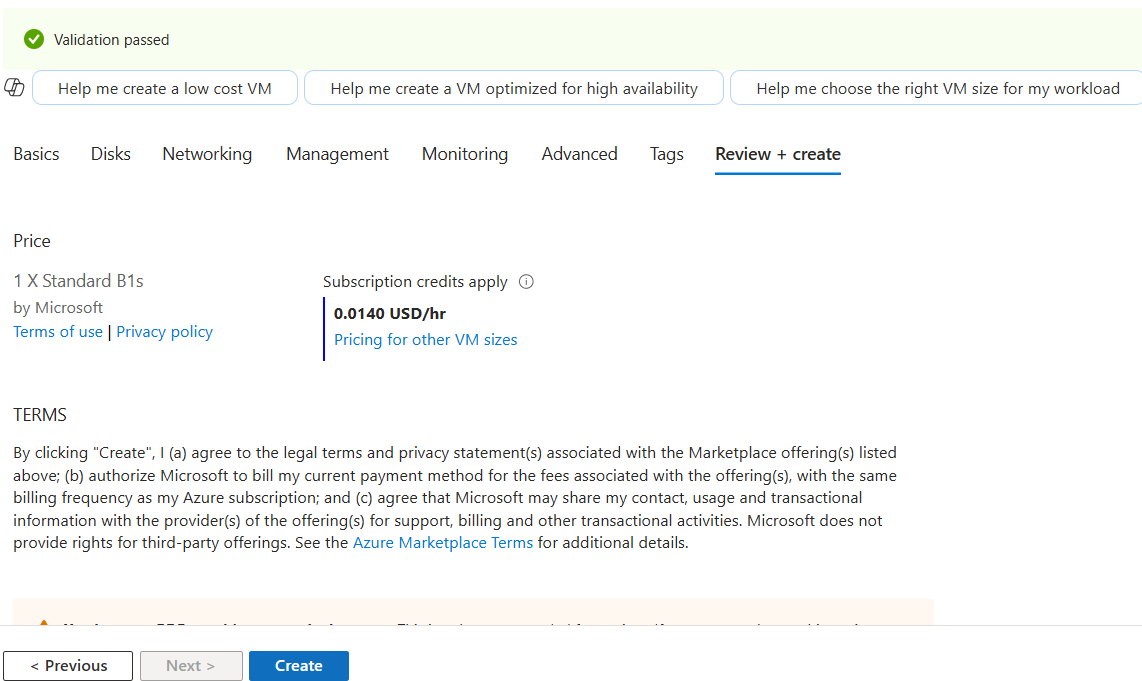
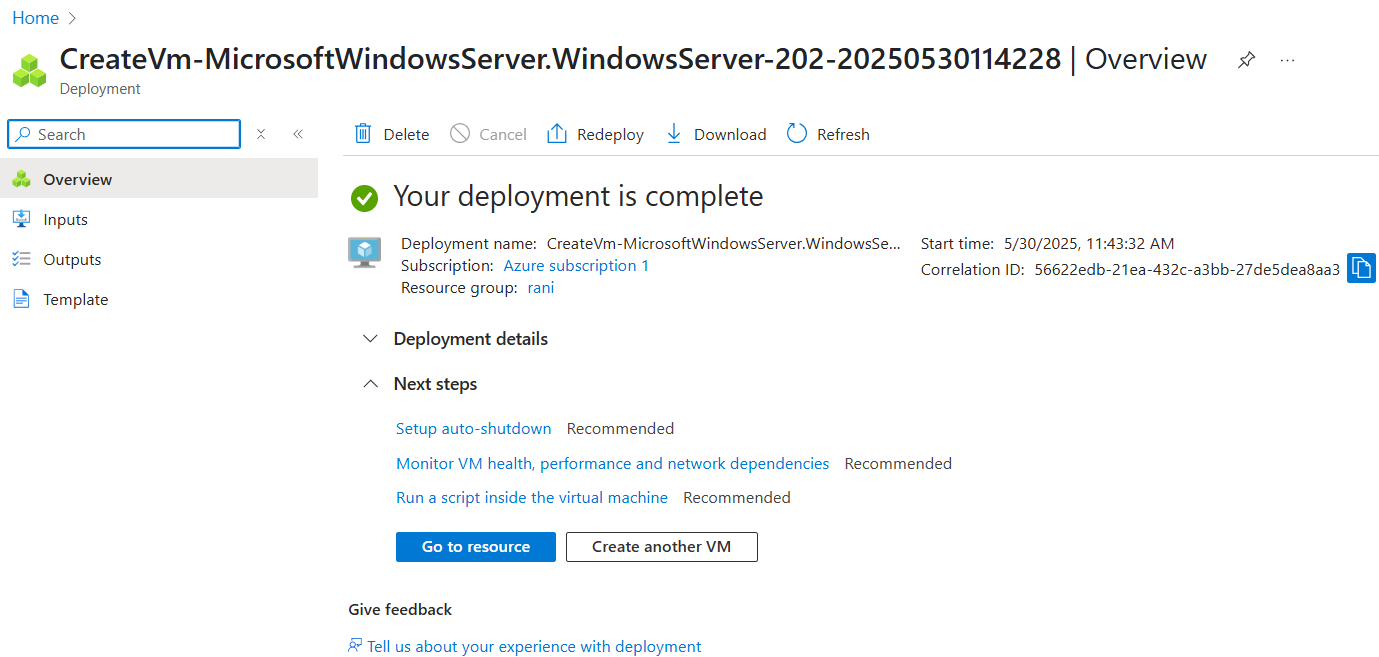
Wait 1–2 minutes — your VM is now live!
💻 Step 5: Connect to the VM
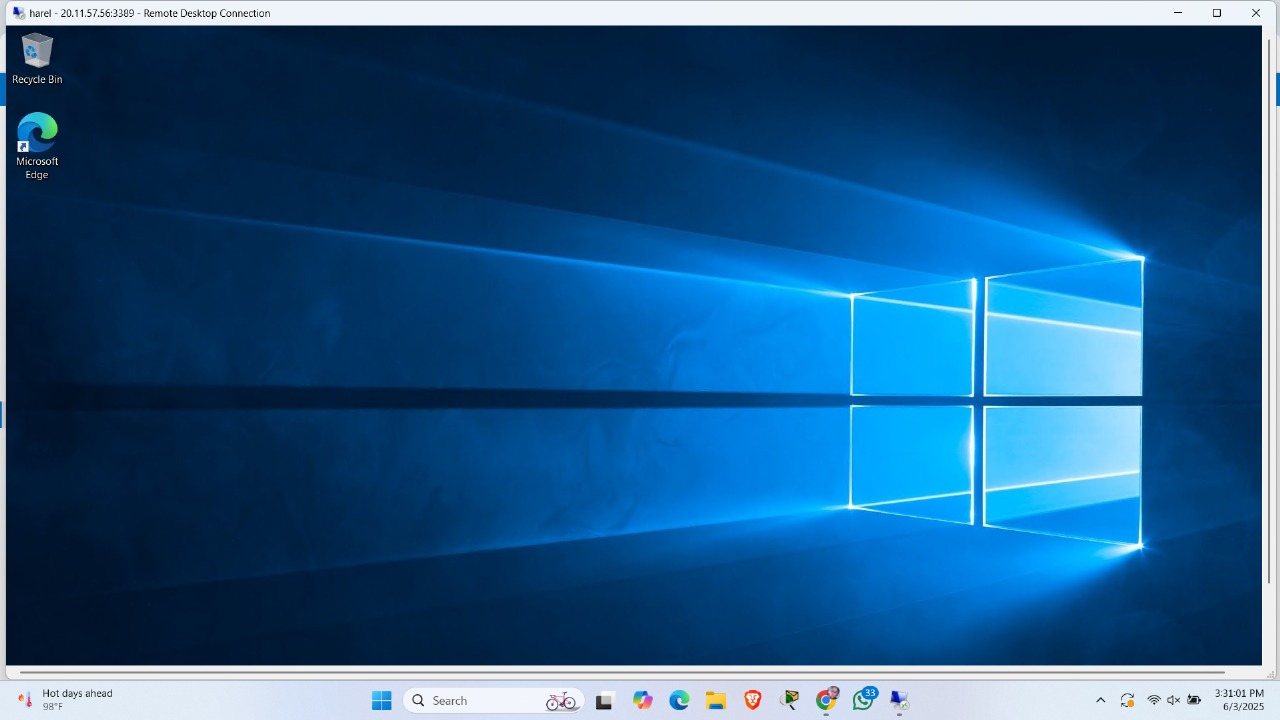
If it’s a Windows VM:
Click on Go to resource
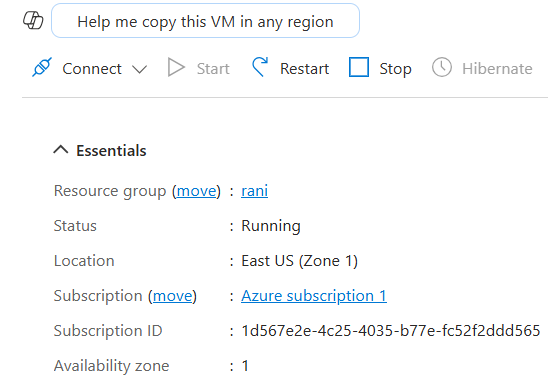
Click Connect > RDP
Download the
.rdpfile and open it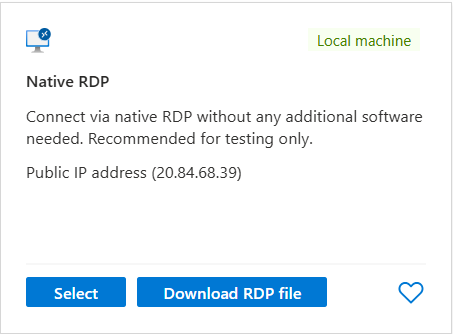
Log in with the username/password you set
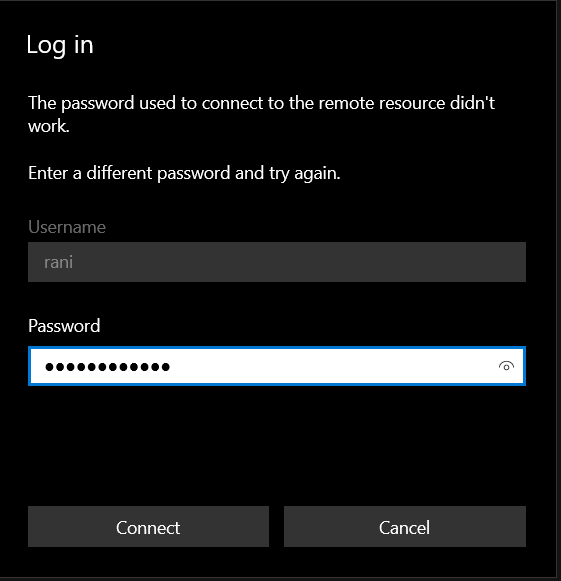
The Virtual Machine Will open.
If it’s a Ubuntu VM:
- select the Ubuntu image

Click Next through the other tabs or leave the default settings
Review and Create
click on creat
Click on Go to resource
copy the public IP address
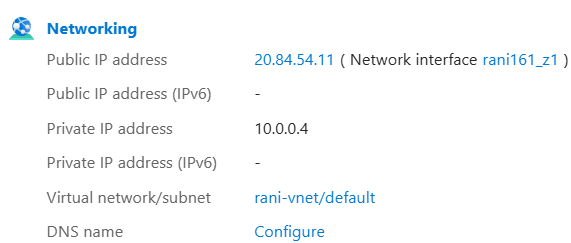
Open Putty and paste IP address
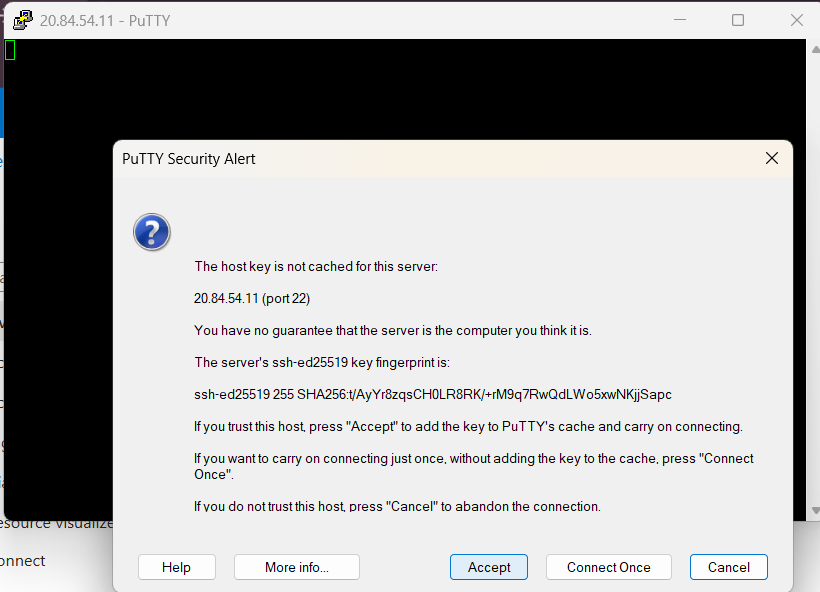
Accept it.
Now you can use Ubuntu.