Scalable Web Application Hosting on AWS using Windows IIS, S3, Route 53, Auto Scaling, and Load Balancers
🧩 Introduction:-
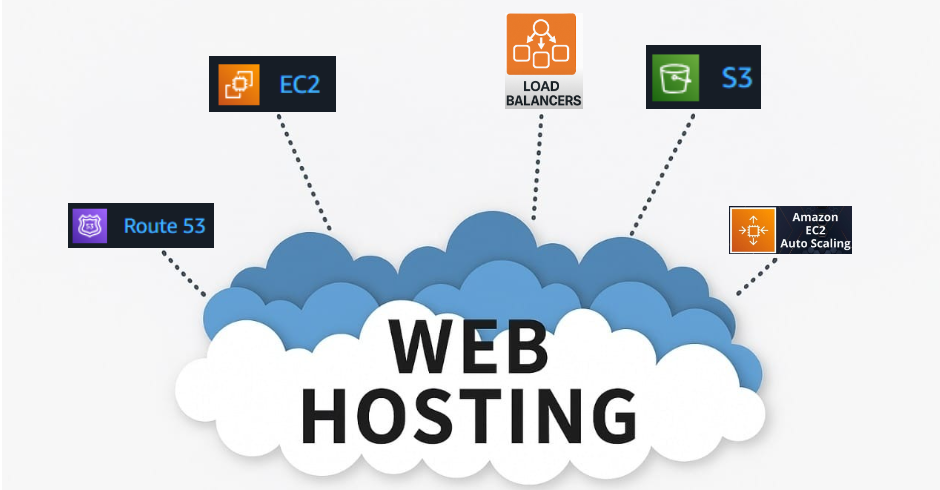
As demand for web applications grows, so does the need for scalable and highly available infrastructure. This project demonstrates a real-world implementation of a highly available and scalable web application using Windows IIS hosted on EC2, Amazon S3 for static content, Elastic Load Balancer (ELB) for traffic distribution, Auto Scaling Group (ASG) for horizontal scaling, and Amazon Route 53 for custom domain routing.
This documentation covers everything from setting up the environment to deployment and DNS integration.
🎯 Goal
To deploy a production-ready web application with:
Amazon S3 for static content (images, CSS, JS).
IIS on EC2 (Windows Server) for hosting dynamic content..
Auto Scaling + Load balancer for high availability and fault tolerance.
Route 53 for domain resolution.
🧰 AWS Services Used
| AWS Service | Role in Architecture |
| S3 | Stores static content (CSS, JS, images) |
| EC2 (Windows) | Hosts IIS web server for dynamic content |
| IAM | Grants EC2 secure access to S3 |
| Elastic Load Balancer (ALB) | Distributes incoming traffic to healthy EC2s |
| Auto Scaling Group | Automatically scales EC2 instances |
| Route 53 | Domain registration and DNS management |
| CloudWatch | Monitors metrics and auto scaling policies |
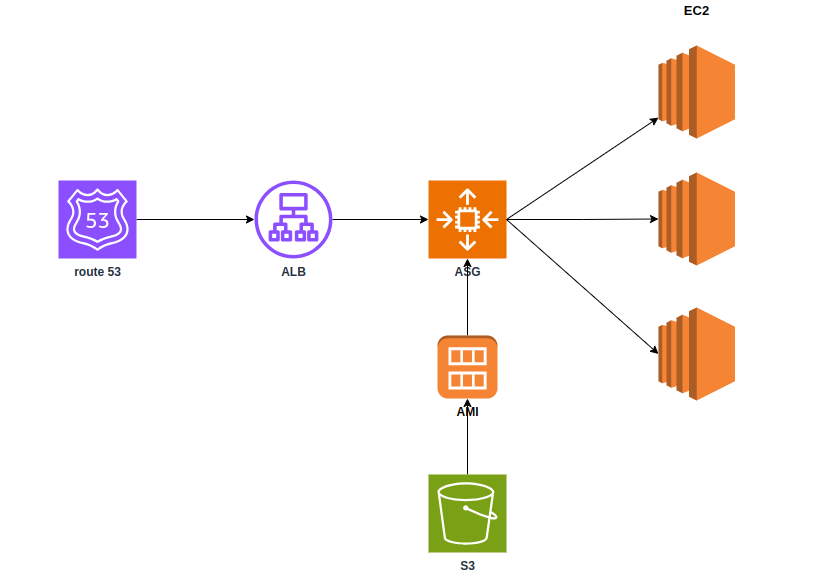
🛠️ Architecture Diagram:
🛠️ Step-by-Step Implementation
Step 1: Upload Static Assets to Amazon S3 :-
Create a Bucket:
Name:
myweb2231- And
Create
- And
Open the Bucket and go to
ObjectsUpload static files
CSS, JS, Images
body { background-color: #f4f4f4; font-family: 'Segoe UI', Tahoma, Geneva, Verdana, sans-serif; text-align: center; padding: 50px; } h1 { color: #2c3e50; font-size: 36px; } p { font-size: 18px; color: #555; } img { margin-top: 20px; border-radius: 10px; box-shadow: 0 0 10px rgba(0,0,0,0.1); }document.addEventListener("DOMContentLoaded", () => { console.log("🚀 Static JS loaded from S3 successfully!"); });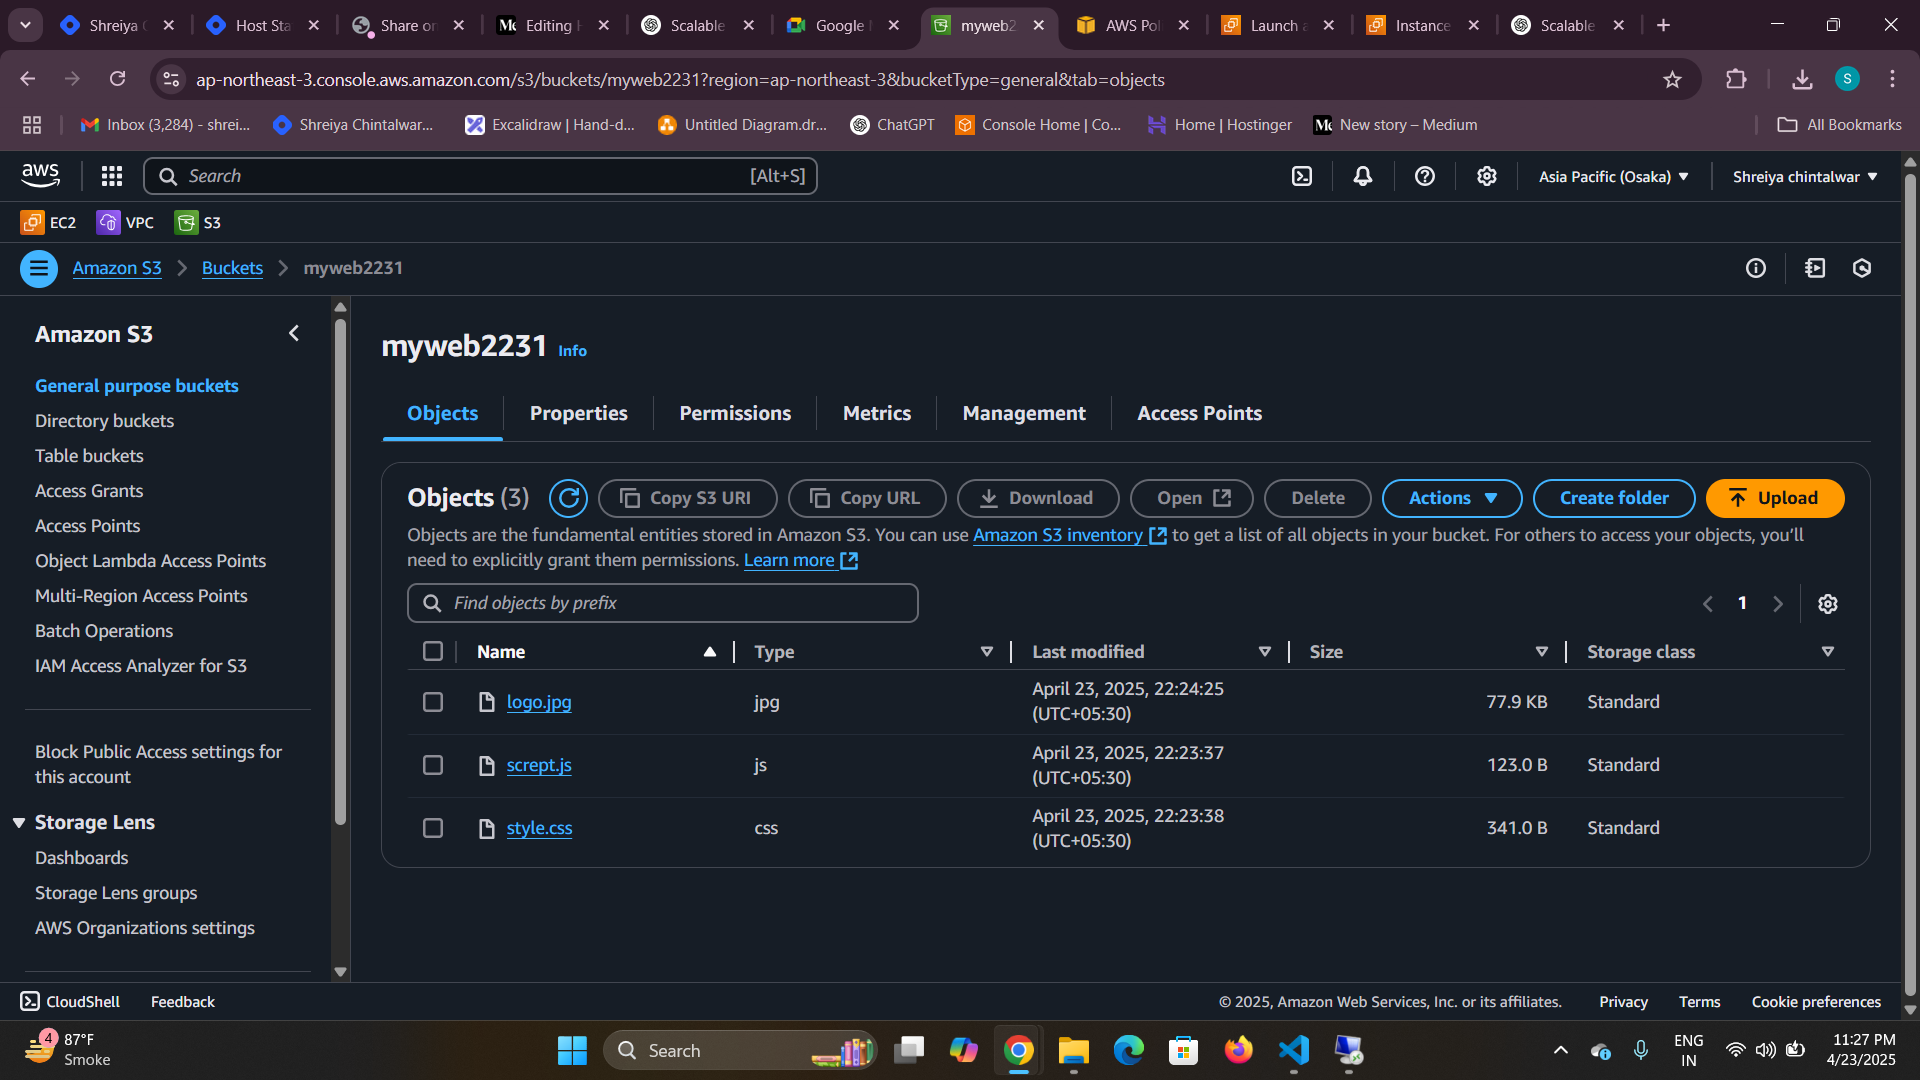
Go to
PermissionsOFFBlock public accessADDBucket policy{ "Version": "2012-10-17", "Id": "Policy1745427984445", "Statement": [ { "Sid": "Stmt1745427982625", "Effect": "Allow", "Principal": "*", "Action": "s3:GetObject", "Resource": "arn:aws:s3:::myweb2231/*", } ] }Object Ownership
enableAccess control list(ACL)
Edit
🖥️ Step 2: Launch EC2 (Windows Server) with IIS:-
Name
Quick Start -
Windowskey pair
Network settings - VPC - Subnet - Auto assign public IP Enable - Firewall (security group) Create security group - security group name - Inbound Security group Rules (
RDP, All traffic, HTTP, HTTPS)Launch instance
Connect the instance - Open RDP - Open Windows Remote Access
Install IIS Server Manager - Add Roles and Features(Select Web IIS)
Upload website files - This pc - Windows - inetpub - wwwroot -new text - add code( This page will be served from EC2, but the image, CSS, and JS will come from S3 ) - save as index.html
  <!DOCTYPE html>
  <html lang="en">
  <head>
      <meta charset="UTF-8">
      <title>My IIS + S3 Website</title>
      <link rel="stylesheet" href="https://myweb2231.s3.ap-northeast-3.amazonaws.com/style.css">
      <script src="https://myweb2231.s3.ap-northeast-3.amazonaws.com/scrept.js"></script>
  </head>
  <body>
      <h1>Welcome to My Website!</h1>
      <p>This is hosted on <strong>Windows EC2 with IIS</strong></p>
      <img src="https://myweb2231.s3.ap-northeast-3.amazonaws.com/logo.jpg" alt="My Logo" width="200">
  </body>
  </html>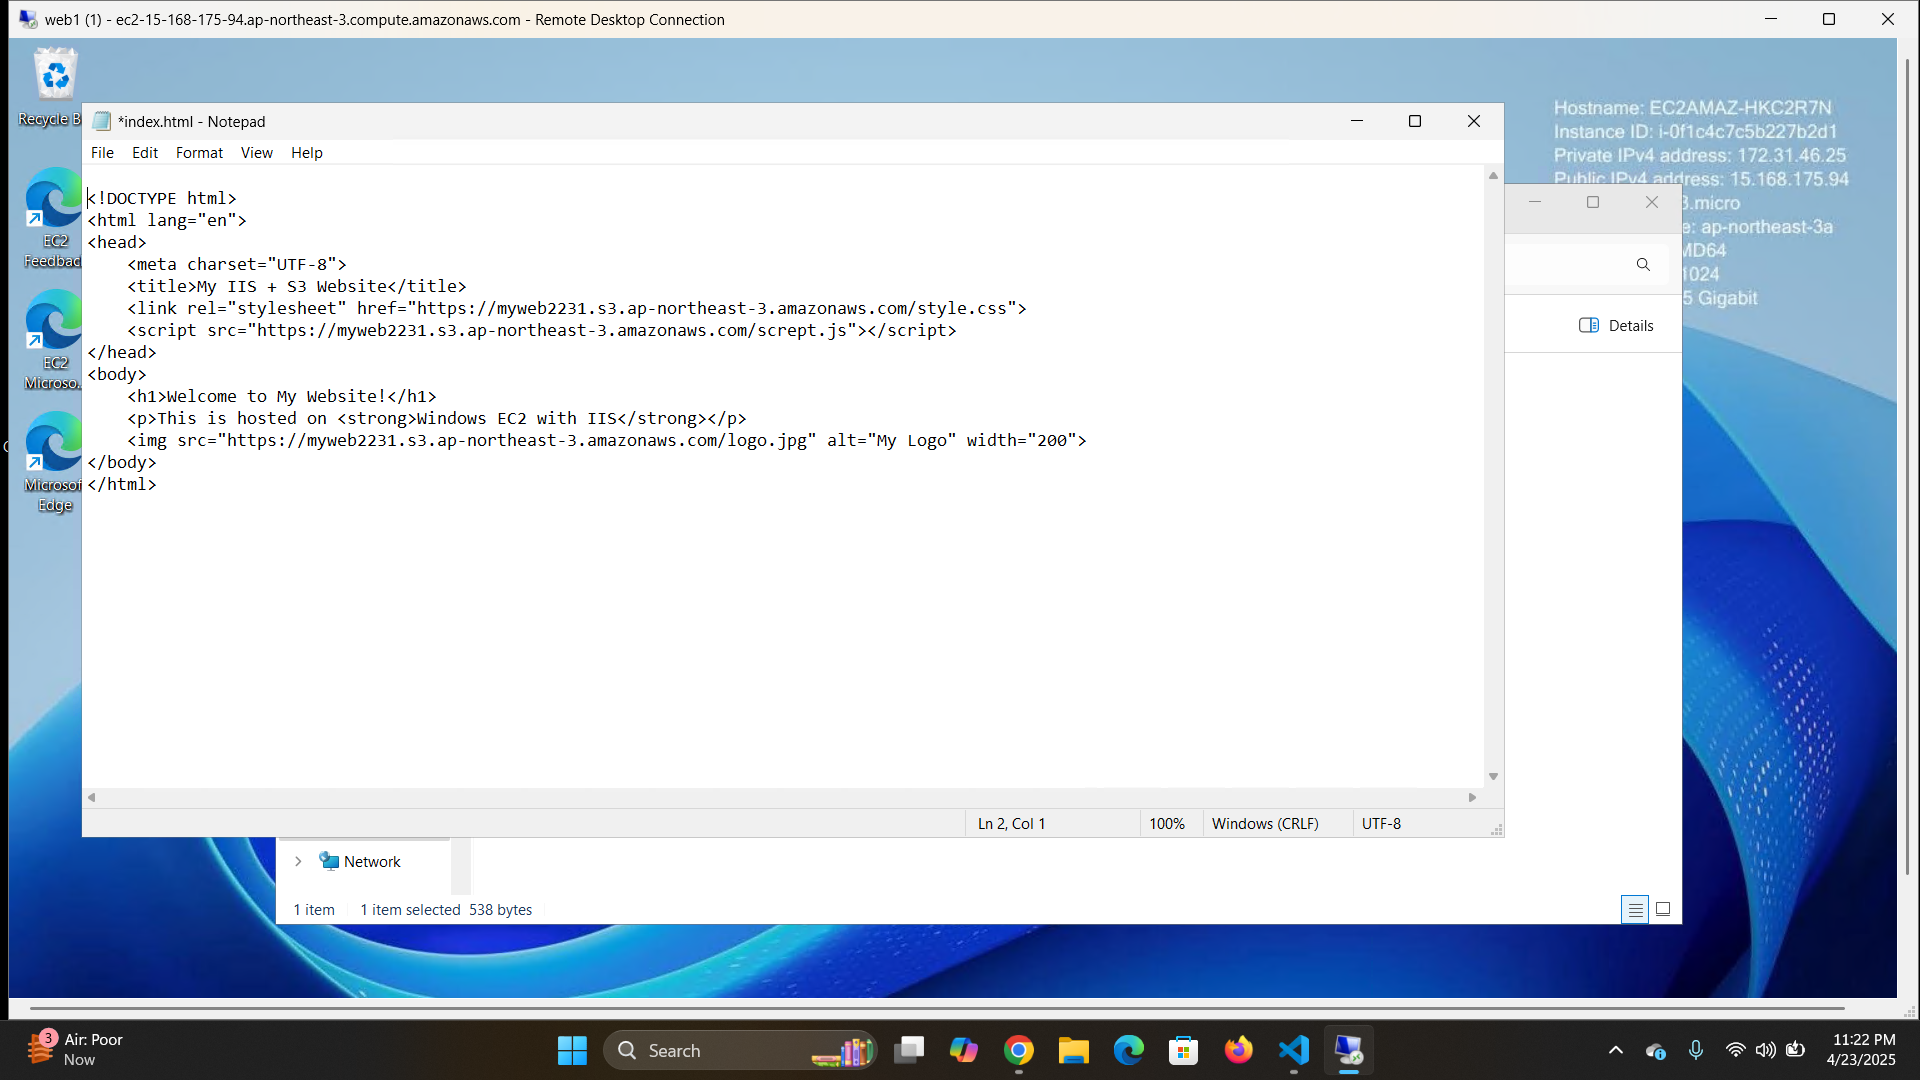
To test the IIS web page, do it from the instance itself. Additionally, by copying the public IP of the instance, you can also test it in your local laptop browser.
🔗 Step 3: Create AMI
- Select instance - Actions - Image and templates - create image
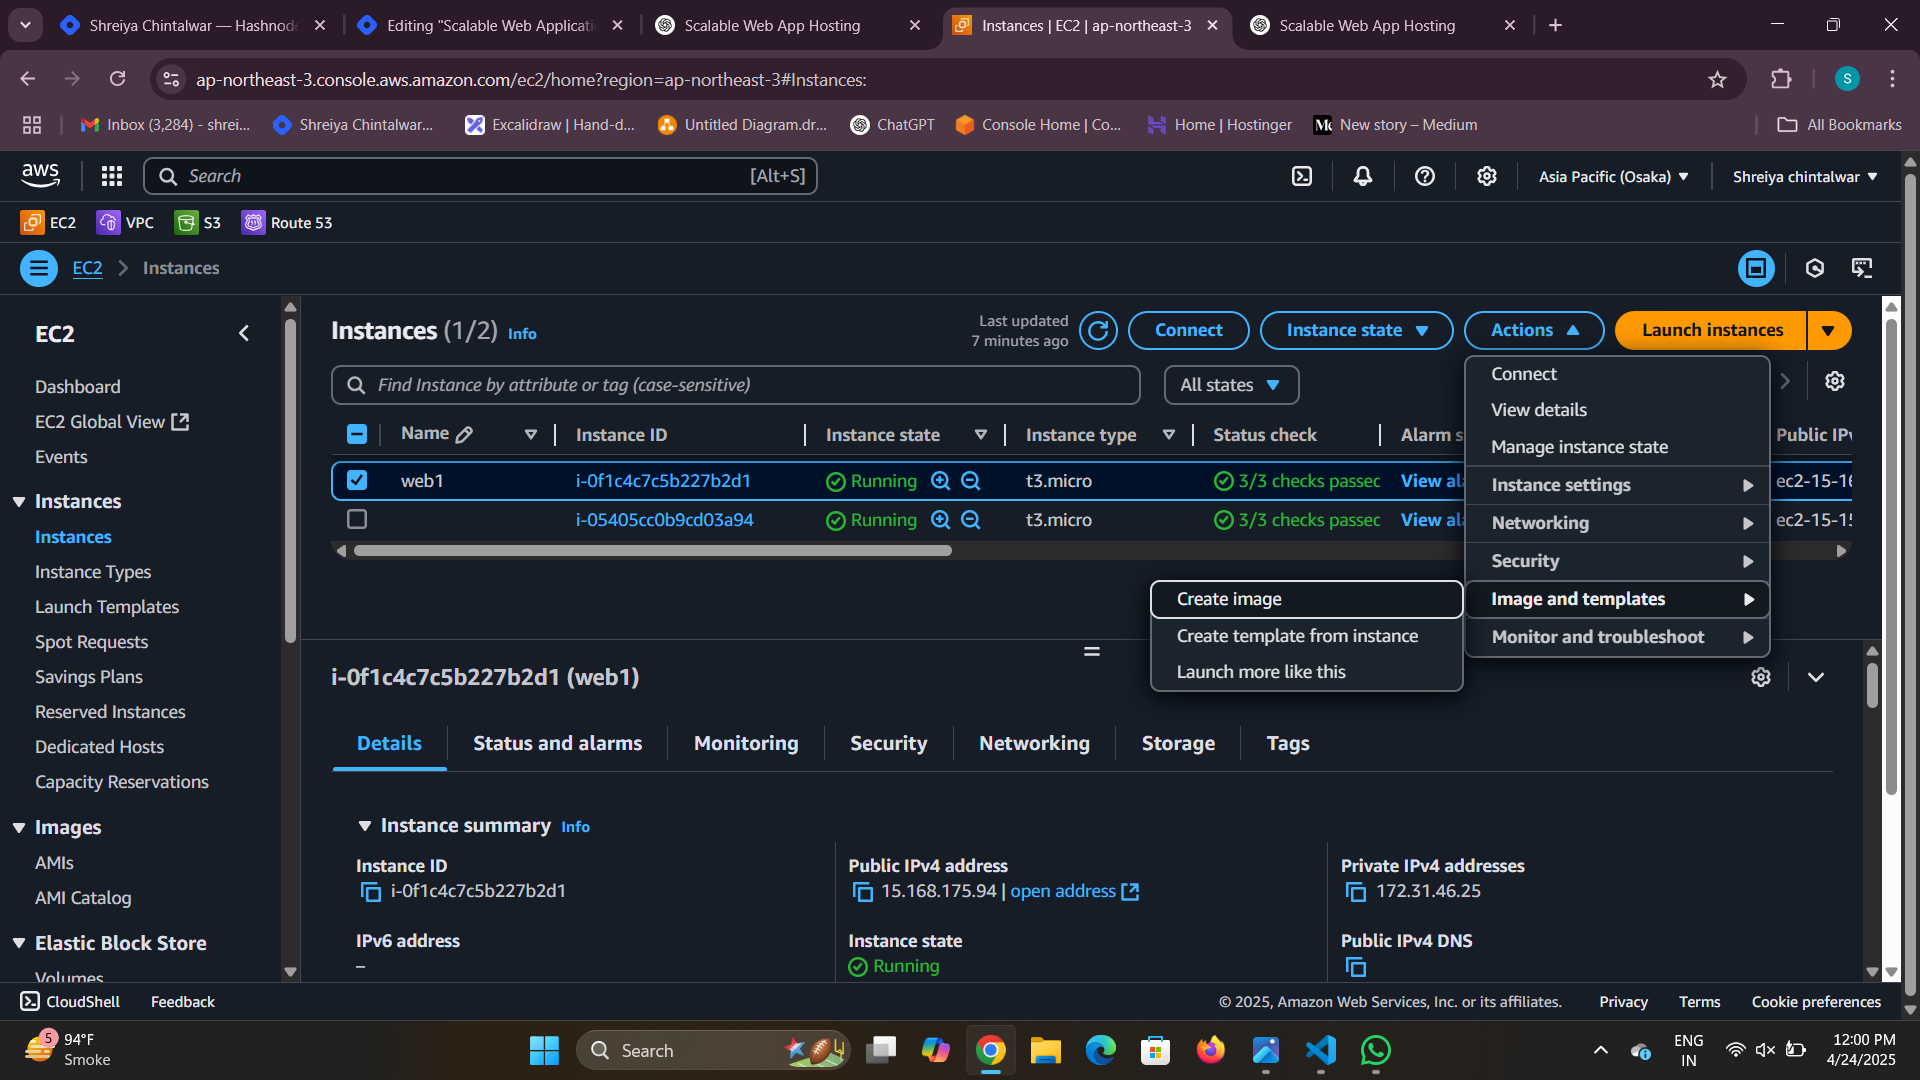
- Name it and create
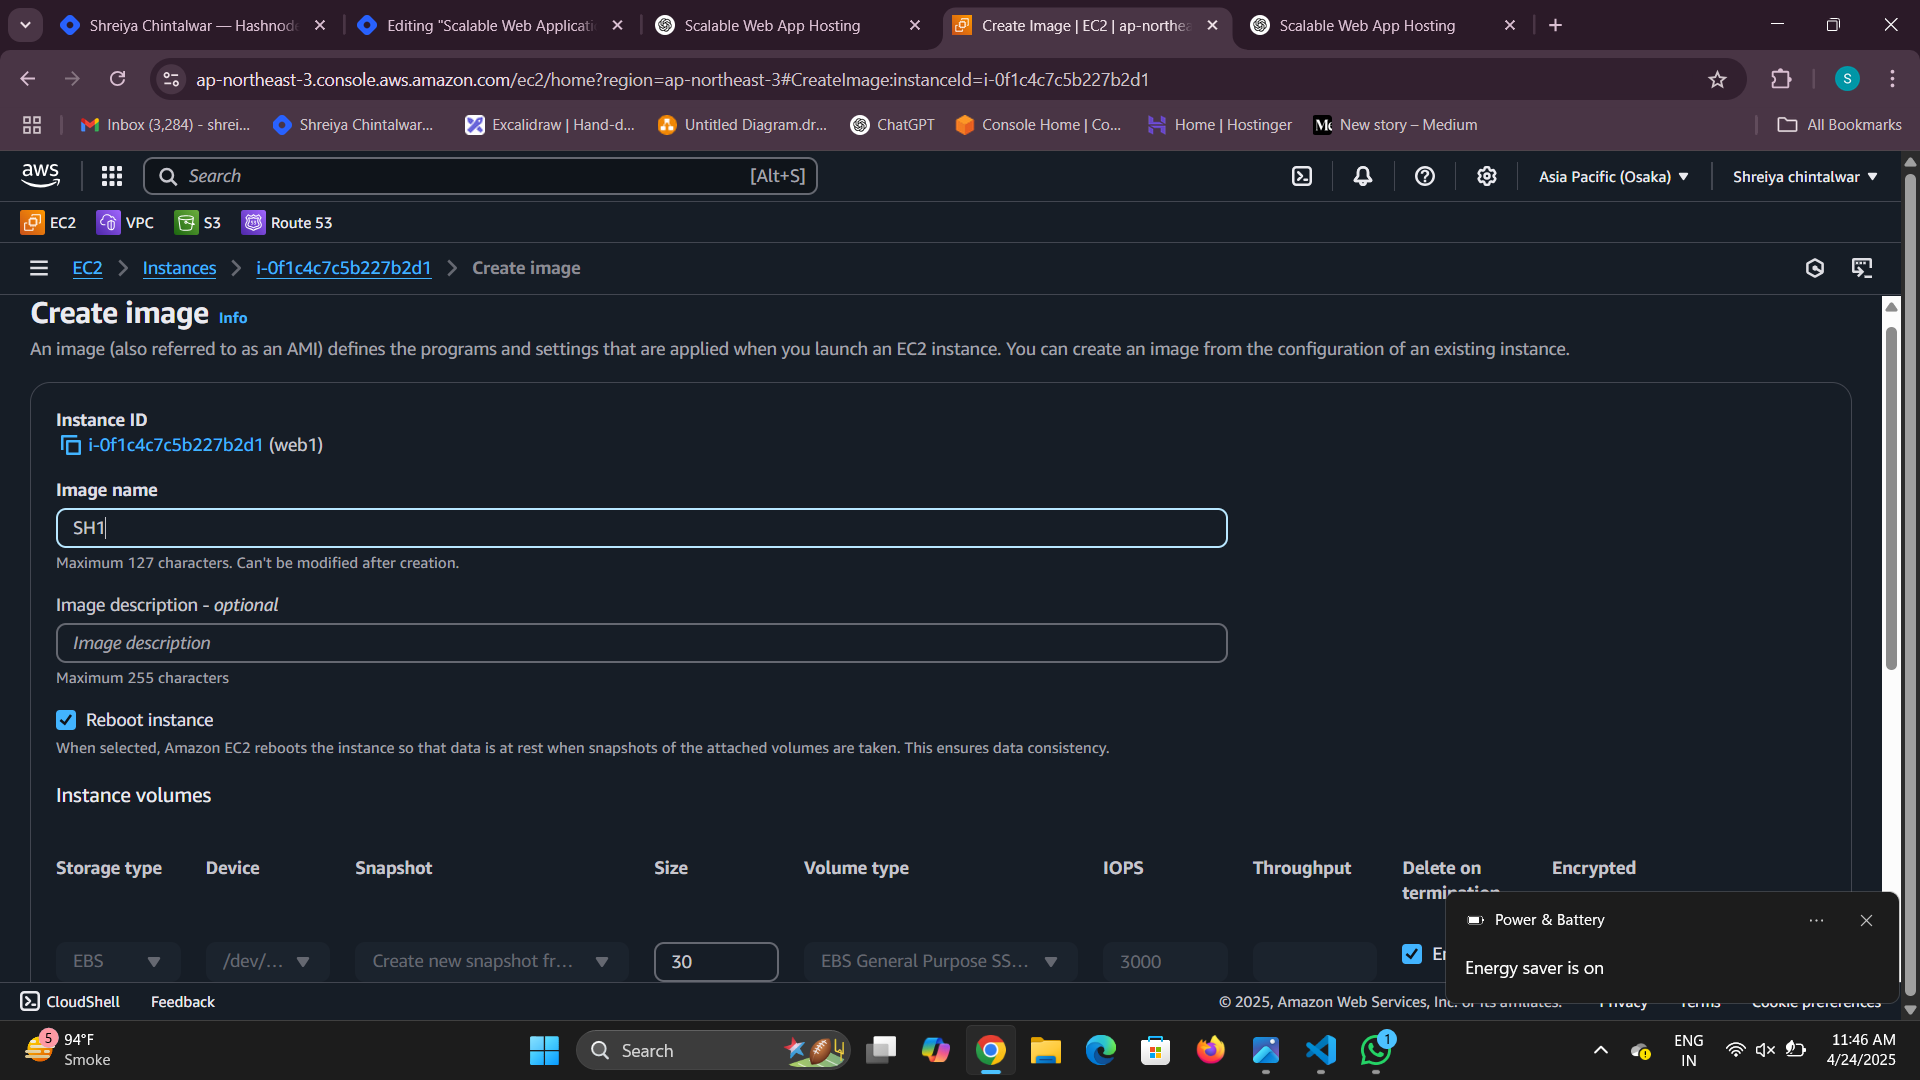
🔗 Step 4: Set Up a Load Balancer
Go to EC2 - Load Balancers
Create an Application Load Balancer - Basic configuration (Load balancer name - select Internet facing - IPv4),
Network mapping ( select all Availability zones and subnets), Security group ( default )
Security group ( select which you created )
Listeners and routing ( Create a target group. Skip the step of adding the instance because we will point the auto-scaling instance to the target group later. )
Again, come to the load balancer - refresh it - select the target group - and create a load balancer
🔗 Step 5: Auto Scaling Group
Step 1: Choose a launch template
Name( Auto scaling group name) - Create a launch template - launch template name - Amazon Machine Image - My AMI - Instance type (t3 micro) _ select key pair - select security group - create and launch template
Go to auto scaling - select launch template - Next
step 2: Choose instance launch options
Instance type requirements - Manually add instance types (t3 micro)
Network - Select all Availability Zones and subnets - Next
step 3: Integrate with other services
Load balancing (Attach to a existing load balancer)
Select your existing load balancer target group - Next.
Step 4: Configure group size and scaling-optional
Group size( Desired capacity 2)
Scaling (Min 1, Max 3)
Automatic scaling-optional (Target tracking scaling policy) - Next
Step 5: Add notifications-optional
- Next
Step 6: Add tags- optional
- next
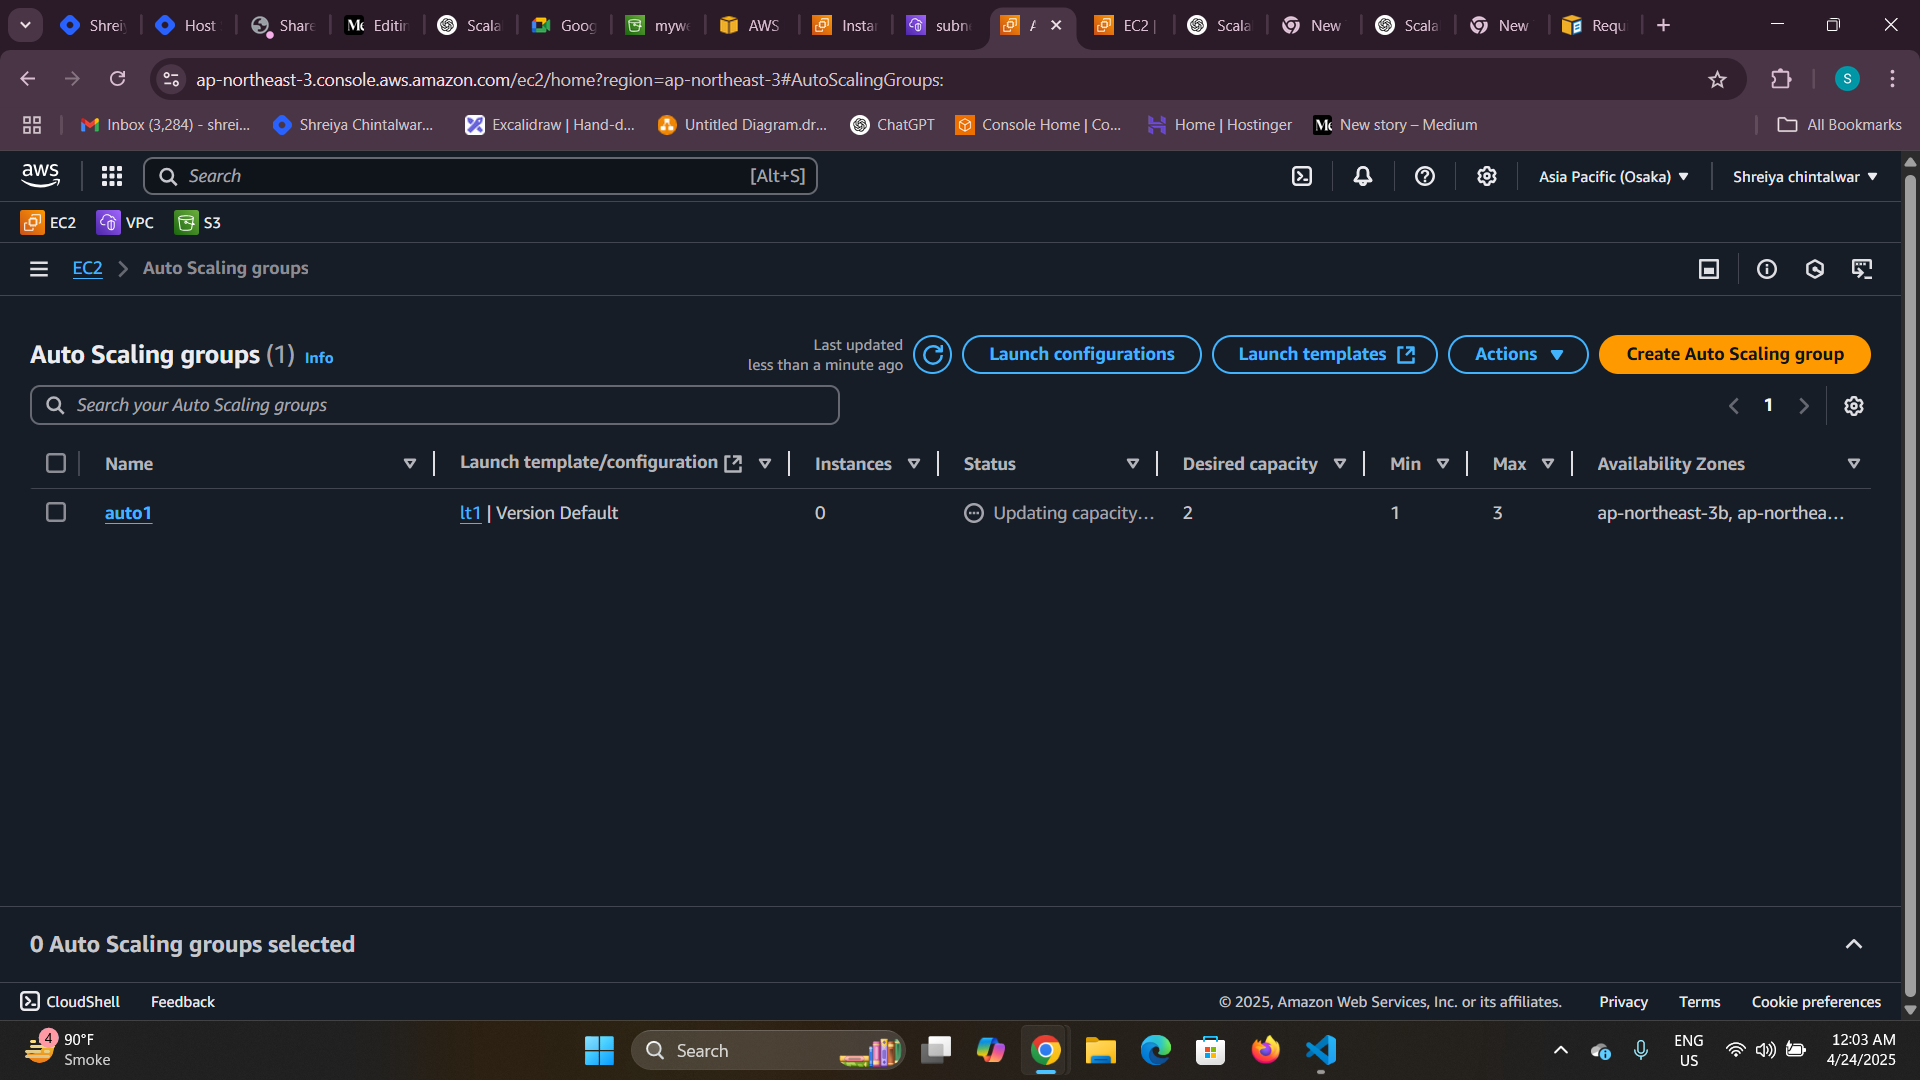
Step 6: Route 53 (Domain)
Go to Route 53 - Hosted Zones - Create hosted zone.
Hosted zone configuration ( Domain name - Kiaana.space ) - Type ( public hosted zone)
Copy all NS records from the hosted zone and paste them on the form where you purchased the domain (e.g., Hostinger, GoDaddy, etc.).
Create record - Record name www.kiaana.space Record type:- select A record on Alias
Route traffic to - Alias to Application and classic load balancer - Select Region where you created all the resources ( Canada Central)
Create records
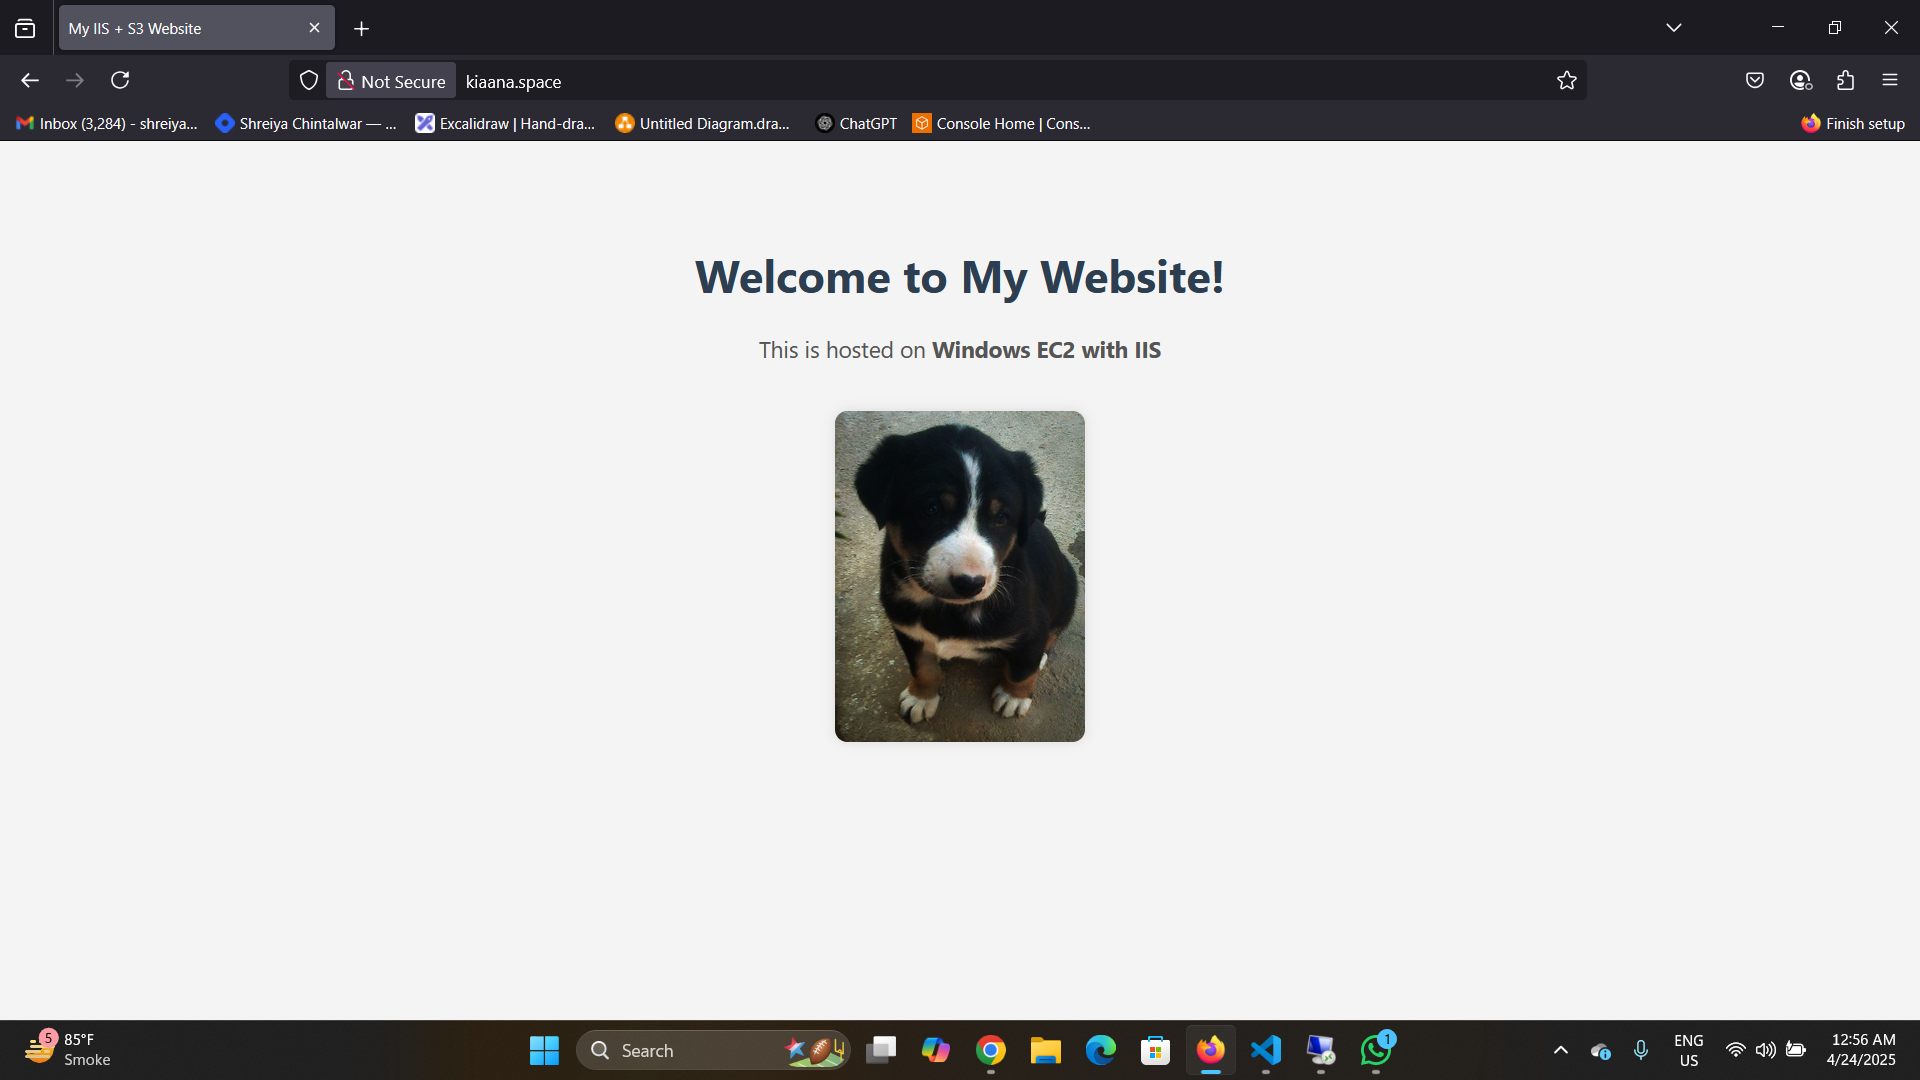
Step 7: Final Result
When a user visits Kiaana.space:
Route 53 → Load Balancer → EC2 Windows Server
The HTML file is served from IIS (which includes S3 image, CSS, and JS URLs)
The browser fetches images, stylesheets, and JS directly from S3
The user sees a fully combined website with content from both EC2 and S3
Happy learning!